Menu
Math Lesson 15.8.2 - Gradient of Curves
Please provide a rating, it takes seconds and helps us to keep this resource free for all to use
Welcome to our Math lesson on Gradient of Curves, this is the second lesson of our suite of math lessons covering the topic of Gradient of Curves, you can find links to the other lessons within this tutorial and access additional Math learning resources below this lesson.
Gradient of Curves
We explained in previous tutorials that the term 'curves' in mathematics is used to describe non-linear graphs with no sharp points. When plotting the curves' graphs, one needs to connect smoothly the points identified to give the curved shape to the graph. We have done so when dealing with all types of graphs (except linear ones) such as quadratic, cubic, exponential, logarithmic, etc. Initially, we made a table of values where each column corresponds to a distinct point of the function graph; then, after inserting all those points into the coordinate system, we connected them smoothly.
In addition, when dealing with circles in tutorial 15.6, we introduced the concept of tangent. In that tutorial, we have explained that tangency occurs when a line touches a circle at a single point. In such cases, the tangent line is perpendicular to the radius r of the given circle at the point of tangency.
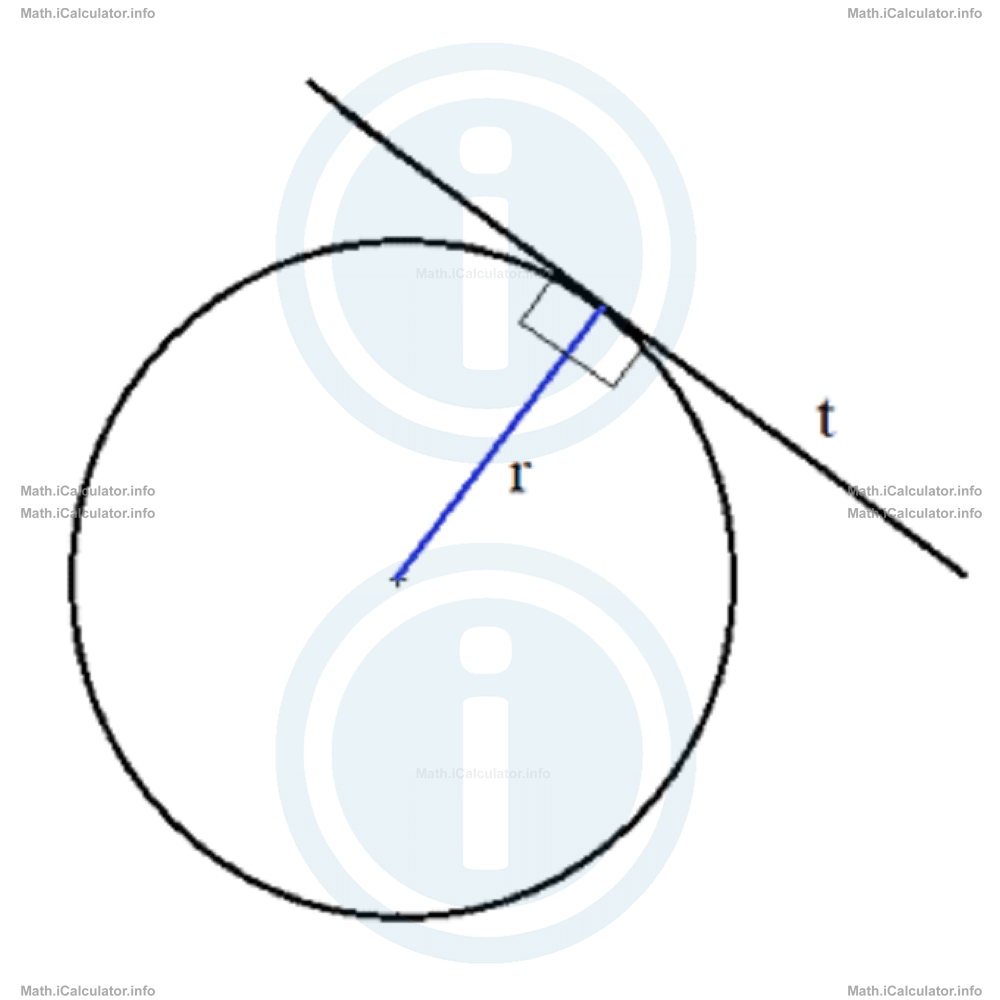
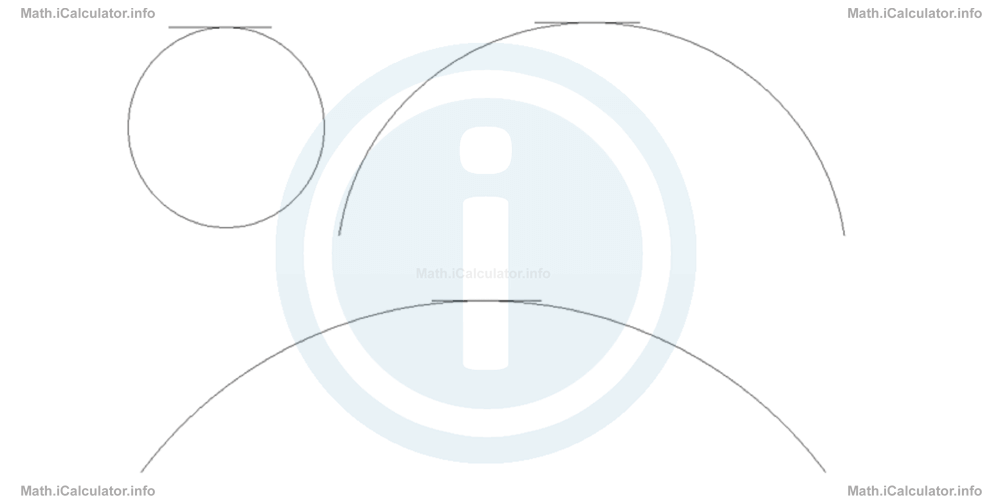
We can extend the concept of tangent to other curves as well. Thus, we can build tangents to any point of the curve by considering the section around the point of tangency as part of a circle, as shown below.
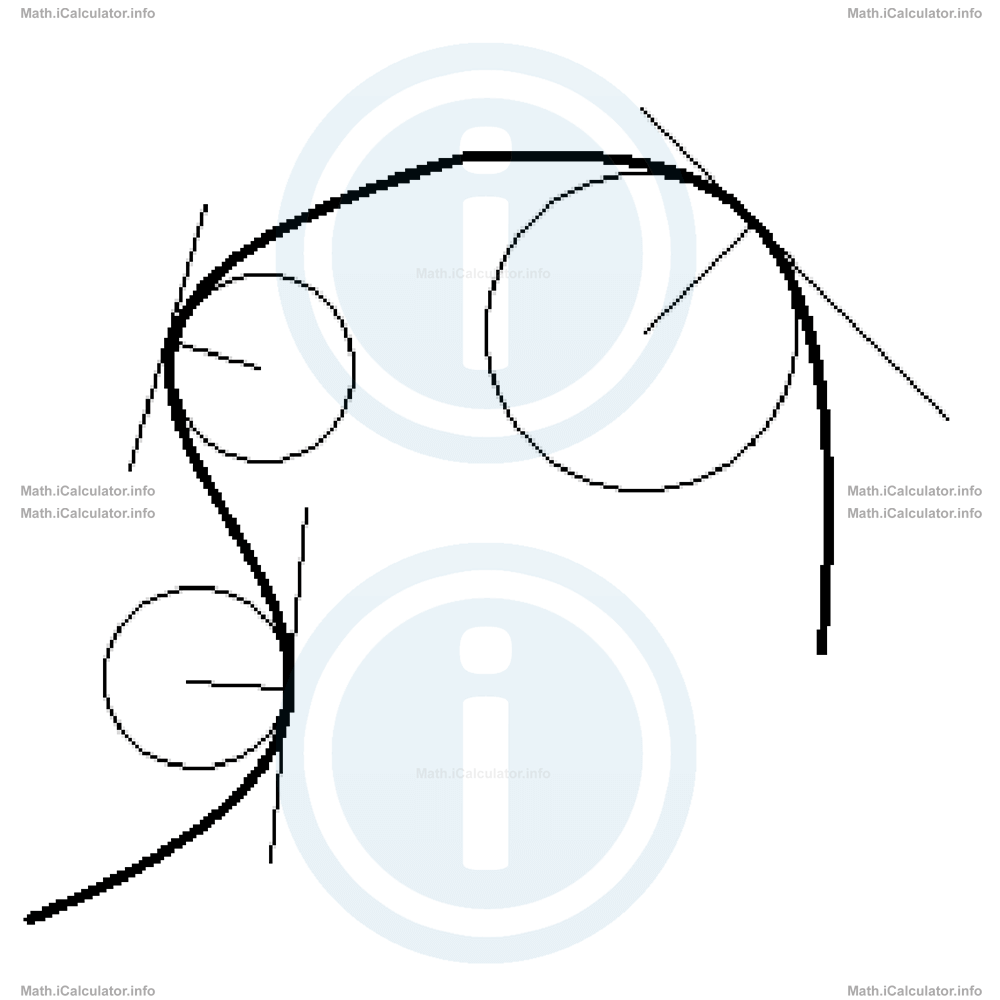
From the figure, it is obvious that unlike in linear graphs where the tangent corresponds to the line itself and therefore it has the same equation as the line, the equations of various tangents in a curve are different, as all of them have different steepness from each other and therefore, different gradients.
When dealing with graphs, we use the term gradient to describe the linear coefficient (inclination) of the tangent line with the graph at a given point. The procedure to calculate the gradient is always the same: after choosing two points from the graph, we divide the change in the y-coordinate by the change in the x-coordinate. However, since the curve changes continuously its angle to the horizontal axis, we must choose the two points as close as possible to each other, where the point of tangency lies between them. This is because the closer the two points chosen, the more the arc between these two points resembles a straight line. We can use the Earth's shape as an analogy to explain this situation. Thus, when watching the Earth from a satellite, its surface looks curved but when you are on the ground, the surface looks flat because you are not able to see beyond the horizon line.
In this way, we reach two important conclusions about the gradients of a curve:
- Curves have different gradients at different points.
- The closer to the point of tangency we choose the two points needed for calculating the gradient, the more accurate the result obtained is.
Let's explain the above points through an example.
Example 1
- Find the gradient of the line y = x2 - 4x + 1 at the point A, B and C with horizontal coordinates xA = -1, xB = 0 and xC = 4.
- Show graphically all gradients found at (a).
Solution 1
- As explained in theory, we must take two points aside from the point of tangency, as close as possible to it. Thus, for the first gradient, we can choose the values x1 = -1.1 and x2 = -0.9. The corresponding y-values are y1 = x21 - 4 ∙ x1 + 1and
= (-1.1)2 - 4 ∙ (-1.1) + 1
= 1.21 + 4.4 + 1
= 6.61y2 = x22 - 4 ∙ x2 + 1Therefore, the gradient of the curve at point A is
= (-0.9)2 - 4 ∙ (-0.9) + 1
= 0.81 + 3.6 + 1
= 5.41kA = y2 - y1/x2 - x1This result means that the y-coordinate in the small region around point A decreases 6 times faster than the increase of the corresponding x-coordinate.
= 5.41 - 6.61/-0.9 - (-1.1)
= -1.2/0.2
= -6 - The same procedure is used for the rest of the points as well. Thus, for point B we take x1 = -0.1 and x2 = 1.1. Therefore, we obtain the corresponding y-values y1 = x21 - 4 ∙ x1 + 1and
= (-0.1)2 - 4 ∙ (-0.1) + 1
= 0.01 + 0.4 + 1
= 1.41y2 = x22 - 4 ∙ x2 + 1Therefore, the gradient of the curve at point B is
= (0.1)2 - 4 ∙ (0.1) + 1
= 0.01 - 0.4 + 1
= 0.61kB = y2 - y1/x2 - x1This result means that the y-coordinate in the small region around point B decreases 4.5 times faster than the increase of the corresponding x-coordinate.
= 0.61 - 1.51/0.1 - (-0.1)
= -0.9/0.2
= -4.5 - Again, applying the same procedure for point C as for the other two points, where x1 = 3.9 and x2 = 4.1, we obtain the corresponding y-values y1 = x21 - 4 ∙ x1 + 1and
= (3.9)2 - 4 ∙ (3.9) + 1
= 15.21 - 15.6 + 1
= 0.61y2 = x22 - 4 ∙ x2 + 1Therefore, the gradient of the curve at point C is
= (4.1)2 - 4 ∙ (4.1) + 1
= 16.81 - 16.4 + 1
= 1.41kC = y2 - y1/x2 - x1This result means that the y-coordinate in the small region around point C decreases 4 times faster than the increase of the corresponding x-coordinate.
= 1.41 - 0.61/4.1 - 3.9
= 0.8/0.2
= 4
- As explained in theory, we must take two points aside from the point of tangency, as close as possible to it. Thus, for the first gradient, we can choose the values x1 = -1.1 and x2 = -0.9. The corresponding y-values are
- Below, we have shown the graph where points A, B and C as well as the surrounding points used to calculate the gradients are shown.
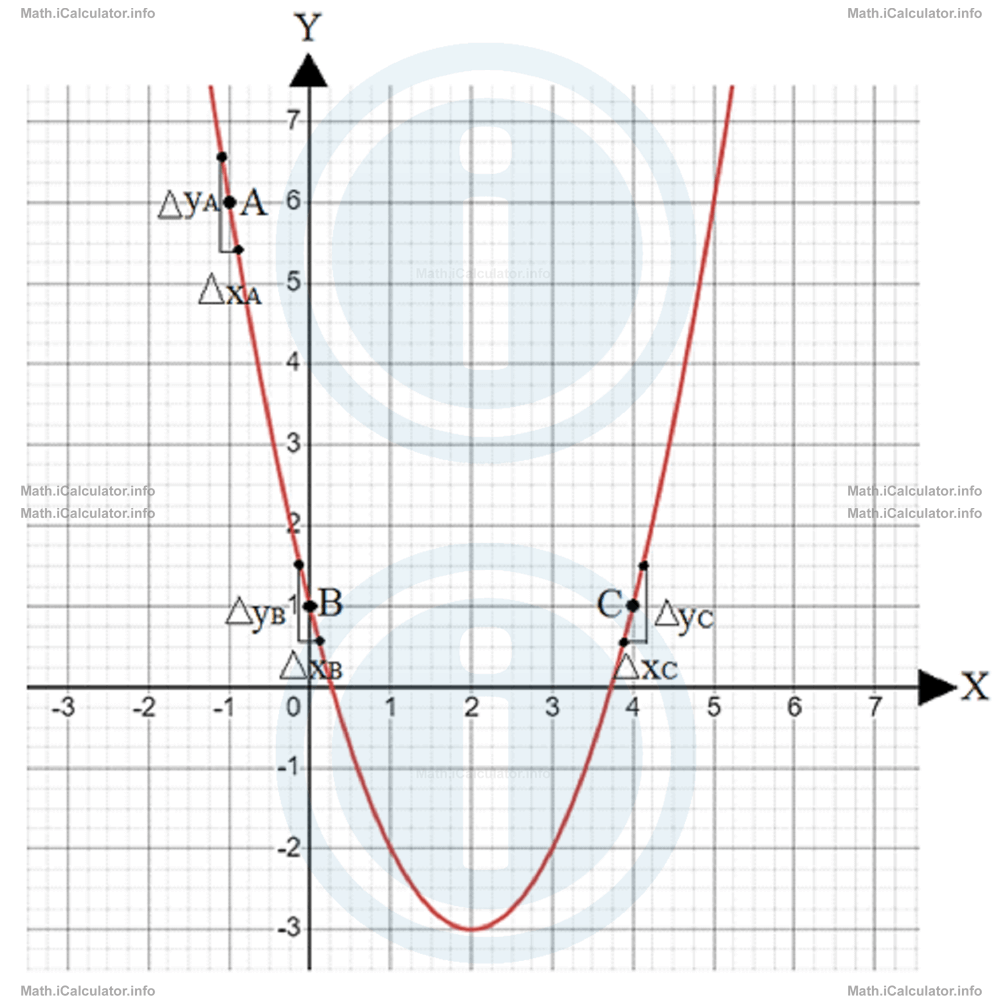
As you see, the graph in points A and B is decreasing; this is the reason why the gradients in these two points are negative. On the other hand, at point C the graph is increasing. Hence, the gradient is positive at this point.
Another thing you can observe from the graph is the closeness to segments of the sections around the given points chosen on the graph. The curve is hardly observable in these sections; they look more like segments than sections of a curve. This is because we chose the surrounding points very close to points A, B and C in which we wanted to find the gradient. Recall the example with the Earth's surface mentioned earlier.
Are there any General Formulas for Calculating the Gradient of a Curve?
In the previous example, we demonstrated that the value of the gradient in a curve is not constant. It changes according to the position of the point chosen in the graph. Obviously, you can use the gradient formula every time you need to find the gradient in a given point. However, this procedure is a bit annoying, as you have to calculate four times (two for the x-direction and two for the y-direction) the value of expressions that contain decimals raised to certain powers. This requires long and careful calculations. In the following lessons we will show you how to find the formula of gradients in two types of curves: quadratic and cubic. The formulas for finding the gradients of other types of curves is explained in the Calculus section of this course.
You have reached the end of Math lesson 15.8.2 Gradient of Curves. There are 4 lessons in this physics tutorial covering Gradient of Curves, you can access all the lessons from this tutorial below.
More Gradient of Curves Lessons and Learning Resources
Whats next?
Enjoy the "Gradient of Curves" math lesson? People who liked the "Gradient of Curves lesson found the following resources useful:
- Definition Feedback. Helps other - Leave a rating for this definition (see below)
- Types of Graphs Math tutorial: Gradient of Curves. Read the Gradient of Curves math tutorial and build your math knowledge of Types of Graphs
- Types of Graphs Revision Notes: Gradient of Curves. Print the notes so you can revise the key points covered in the math tutorial for Gradient of Curves
- Types of Graphs Practice Questions: Gradient of Curves. Test and improve your knowledge of Gradient of Curves with example questins and answers
- Check your calculations for Types of Graphs questions with our excellent Types of Graphs calculators which contain full equations and calculations clearly displayed line by line. See the Types of Graphs Calculators by iCalculator™ below.
- Continuing learning types of graphs - read our next math tutorial: Quadratic Graphs Part One
Help others Learning Math just like you
Please provide a rating, it takes seconds and helps us to keep this resource free for all to use
We hope you found this Math tutorial "Gradient of Curves" useful. If you did it would be great if you could spare the time to rate this math tutorial (simply click on the number of stars that match your assessment of this math learning aide) and/or share on social media, this helps us identify popular tutorials and calculators and expand our free learning resources to support our users around the world have free access to expand their knowledge of math and other disciplines.